The Ultimate Guide to Baseboard Moulding: Styles, Materials, and Installation
I. Introduction
Baseboard moulding goes by many names, base trim, skirting board, floor moulding, but its role in a well-finished room is always the same: it’s the architectural handshake between your walls and your floor. Technically speaking, baseboard is a type of trim, but not all trim is baseboard.
Trim is the broader category covering any decorative or functional moulding in a space, from door casings to crown moulding. Baseboard is the specific strip that runs along the base of interior walls.
Its purpose is dual. On the practical side, it conceals the expansion gap that flooring installers intentionally leave at the wall’s edge, while shielding drywall from scuffs, vacuum cleaners, and everyday wear. On the aesthetic side, it anchors a room visually, a finishing detail that signals craftsmanship and intention.
In 2026, baseboard design is at an interesting crossroads. The minimalist movement has pushed clean, low-profile styles into modern builds, while a growing number of homeowners are integrating LED lighting channels directly into baseboard profiles for subtle ambient illumination.
Whether your taste runs traditional or contemporary, understanding your options is the first step to making the right choice.
Let’s dive deeper!
II. Understanding Baseboard Styles & Profiles

Baseboard profiles range from ornate to stripped-back, and choosing the right one comes down to matching your trim to your home’s architectural character. Here is a breakdown of the most common styles.
Colonial & Traditional
The most recognized baseboard style in North American homes, colonial profiles feature gentle S-curves and ogee details that add visual warmth. The 713 profile, with its classic layered silhouette, remains a go-to choice for builders and remodelers alike.
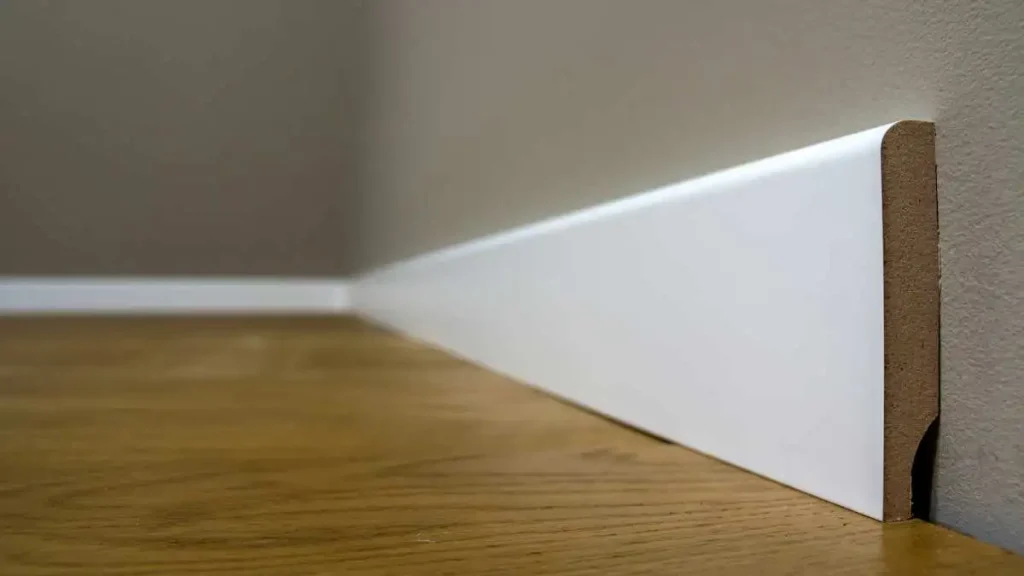
Modern & Contemporary
For homes that favor simplicity, less is more. Flat, square-edged boards in 1×4 or 1×6 dimensions dominate new construction, offering clean transitions without competing with bold furniture or statement walls.
Craftsman
Rooted in the Arts and Crafts movement, Craftsman baseboard takes a different approach by favoring thick, substantial boards with minimal ornamentation. The emphasis is on honest material and solid presence over decorative flourish.
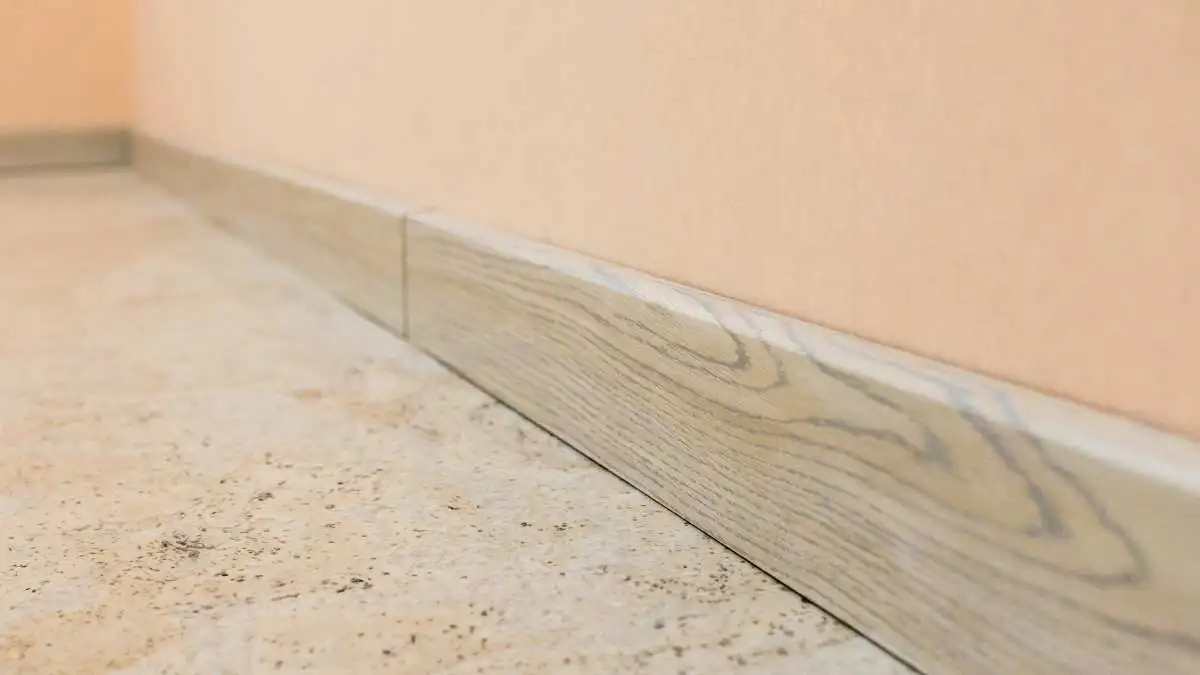
Bullnose
When a softer finish is the goal, bullnose profiles deliver. A rounded top edge creates a more approachable look, popular in casual living spaces and children’s rooms where hard edges feel out of place.
Specialty Moulding
Beyond standard profiles, several complementary pieces complete the baseboard system. Base cap sits atop the baseboard for added detail. Shoe moulding and quarter round both run along the floor joint, though shoe moulding is flatter and more refined, while quarter round follows a more literal curved geometry. At the decorative end of the spectrum, Victorian profiles layer intricate carvings and stacked details for interiors where grandeur is the goal.
III. Material Matters: Choosing the Right Core
The profile you choose determines how your baseboard looks. The material determines how long it lasts. Each option comes with its own trade-offs in cost, workability, and performance.
MDF (Medium-Density Fiberboard)
MDF is the workhorse of the baseboard world, and for good reason. It is affordable, dimensionally stable, and typically comes pre-primed and ready to paint. Because it is manufactured under pressure, it holds crisp detail without the knots or grain inconsistencies you find in natural wood. The main caveat is moisture: MDF swells when wet, making it a poor choice for humid environments.
Wood Options

For those who want the real thing, solid wood remains the premium choice. Oak offers exceptional durability and takes stain beautifully. Pine is more budget-friendly and easy to work with. Walnut brings a rich, dark character suited to high-end interiors. Finger-jointed pine sits in the middle ground, using shorter wood pieces bonded together to reduce cost while maintaining a paintable surface.
Pre-finished wood trims installation time but limits your color flexibility down the line. Unfinished wood demands more labor upfront, but gives you full control over the final look.
Durable and Waterproof Alternatives
When moisture is a real concern, wood-based materials step aside. PVC and vinyl baseboards are fully waterproof, making them the practical standard for bathrooms, laundry rooms, and garages. They resist swelling, warping, and mold without any special treatment.
Rubber baseboard is common in commercial settings like hospitals and schools, where durability and seamless curved-wall installation matter more than aesthetics.
For residential projects that need something tougher than MDF but more affordable than solid wood, composite and high-density plastic options offer a reliable middle path with solid impact resistance and a clean painted finish.
IV. Sizing and Dimensions
Getting the profile and material right is only half the equation. Choosing the wrong size can make even the most beautiful baseboard look awkward, either disappearing into the room or overwhelming it. Understanding the basics of height, thickness, and proportion will help you land on dimensions that feel intentional.
Height Guide
Baseboard height is where you make the biggest visual statement. The most common sizes fall into a few practical categories.
Standard height baseboards, typically 3-1/2 inches, are the default in builder-grade construction. They are modest, functional, and blend into the background without drawing attention. Stepping up to 5-1/4 inches adds a noticeable sense of finish and craftsmanship without veering into dramatic territory. This range works well in most average-height rooms.
For those looking to make a bolder architectural statement, tall baseboards in the 7 to 8 inch range create a grounded, high-end feel. They are increasingly popular in new construction and whole-home renovations where the trim is meant to be noticed.
Thickness and Length

Thickness is less about aesthetics and more about practicality. The two standard options are 1/2 inch and 3/4 inch. Thinner 1/2 inch boards are lighter and easier to handle, but can feel flimsy against the wall, especially in high-traffic areas. The 3/4 inch thickness offers a more substantial look, holds fasteners better, and tends to sit more cleanly against uneven drywall.
On length, most baseboard comes in standard 8-foot sticks, which work well for smaller rooms with frequent corners and transitions. Longer 16-foot lengths reduce the number of joints needed in larger spaces, producing a cleaner, more seamless run along open walls. Fewer seams also means less filling, sanding, and touch-up painting after installation.
Proportion Rules
Perhaps the most overlooked dimension consideration is how baseboard height relates to ceiling height. A useful rule of thumb is to allocate roughly one inch of baseboard height for every foot of ceiling height. An 8-foot ceiling pairs naturally with a 3-1/2 to 4-inch base. A 9 or 10-foot ceiling can comfortably carry 5-1/4 to 6-inch profiles. Rooms with dramatic 12-foot or vaulted ceilings benefit most from the 7 to 8-inch statement sizes.
The goal is always visual balance. Baseboard should feel like a natural extension of the room, grounding the walls without competing with everything above it.
V. Modern Innovations (The “Hidden” Features)
Baseboard moulding has always served a practical purpose, but in 2026, that practicality has taken on a new dimension. A growing category of functional and technology-integrated products is turning a once-overlooked finish detail into a genuine design feature.
Smart Baseboards and Integrated LED Lighting

One of the most significant shifts in the trim industry is the rise of baseboard profiles designed to house LED light strips. These profiles include a routed channel along the top or face of the board, allowing a continuous run of low-voltage lighting to sit flush within the moulding itself. The result is a clean, diffused glow at floor level that works as ambient lighting, nighttime wayfinding, or a deliberate architectural accent.
The appeal goes beyond aesthetics. Because the LED strip is integrated directly into the trim, there are no visible cords, no surface-mounted fixtures, and no awkward adhesive strips peeling off baseboards over time. Several manufacturers now offer aluminum-insert profiles specifically engineered for this purpose, with frosted diffuser covers that soften the light output for a polished finish.
Wire Management and Cover-Up Applications
Beyond lighting, modern baseboard design has also addressed one of the most persistent headaches in finished interiors: visible wires. Hollow-channel baseboards allow low-voltage cables, such as those for speakers, networking, or device charging, to run cleanly behind the trim and out of sight. This makes them particularly valuable in media rooms and home offices where cable clutter is a real concern.
On the renovation side, snap-over and overlay baseboard systems have made it easier to refresh outdated trim without full removal. These profiles install directly over existing baseboard, saving time, reducing demolition mess, and cutting labor costs considerably.
Together, these innovations reflect a broader shift in how builders and homeowners think about trim: not just as a finishing touch, but as a functional layer of the room itself.
VI. The Buyer’s Guide
Once you have settled on a profile, material, and size, the next step is figuring out where to buy, what to budget, and how much to order. A little planning at this stage saves both money and frustration at the job site.
Where to Shop
For most homeowners, the major home improvement retailers are the natural starting point. Home Depot and Lowe’s carry a broad selection of MDF, finger-jointed pine, and PVC profiles, with consistent stock and the convenience of same-day pickup. Menards, available in the Midwest, is worth checking for competitive pricing on standard profiles.
For less common profiles, solid wood species, or larger volumes, local millwork suppliers and lumber yards are often the better option. They can offer custom profiles, longer lengths, and material quality that the big-box stores simply do not stock. If you are working on a high-end project or need to match existing historic trim, a specialty millwork shop is worth the extra effort.
Cost Analysis
Material costs vary significantly depending on what you choose. MDF baseboard typically runs between $0.50 and $1.50 per linear foot, making it the most accessible option for large projects. Finger-jointed pine lands in the $1.00 to $2.00 range, while solid wood profiles such as oak or walnut can climb to $3.00 to $6.00 or more per linear foot depending on the species and profile complexity. PVC and composite options generally fall between $1.50 and $3.50 per linear foot.
For professional installation, labor costs typically range from $1.00 to $3.00 per linear foot depending on your region, the complexity of the layout, and the number of corners and transitions involved. A full home installation can add up quickly, so it is worth getting multiple quotes if budget is a consideration.
Using a Baseboard Calculator and the 10% Rule
Before placing your order, calculate the total linear footage of your room by measuring each wall and adding them together. Most online baseboard calculators will do this automatically once you enter the room dimensions.
From there, always add a minimum of 10 percent to your total. This accounts for offcuts at corners, any pieces ruined during cutting, and the occasional measuring error. For rooms with many corners, angles, or bay windows, bumping that buffer to 15 percent is a smarter move. Ordering a little extra upfront is far less costly than a second trip to the store mid-project.
VII. How to Install Baseboard Moulding (Step-by-Step)
Even the best baseboard falls flat when installed poorly. A clean, professional result comes down to having the right tools, preparing the space thoroughly, and understanding a handful of cutting techniques that separate a tight fit from a sloppy one.
Tools Required
A miter saw is the centerpiece of any baseboard installation. A compound miter saw is ideal, as it handles both angled and beveled cuts for complex corners. For fastening, a finish nail gun loaded with 15- or 16-gauge nails is the standard choice. Use 2-inch nails for standard drywall over wood framing, and bump up to 2-1/2 inches when going through thicker material or into concrete board. A stud finder, tape measure, pencil, and a long level round out the essentials. For removal work, a pull bar, pry bar, and oscillating multi-tool will help lift old trim without tearing up the wall.
Preparation
Start by removing existing baseboard carefully. Score the paint line along the top of the trim with a utility knife before prying to avoid peeling drywall paper. Work slowly and use a thin pry bar, backing it against a scrap of wood to protect the wall surface.
Once the old trim is out, inspect the walls and floor for any damage that needs patching. Then walk the perimeter of each room with a tape measure, recording the length of every wall. Sketch a simple floor plan and note the type of corner at each junction, whether inside or outside, so you can plan your cuts in advance.
Cutting Techniques
Inside corners present a choice between miter cuts and coped joints. A miter cut meets two pieces of baseboard at 45 degrees to form a 90-degree corner. It is faster but can open up as wood expands and contracts with humidity. A coped joint, where one piece is cut straight to the wall and the other is contoured to overlap it, is more time-consuming but produces a tighter, more durable result. Experienced trim carpenters almost always cope inside corners.
Outside corners, such as those wrapping around a fireplace hearth or room projection, use opposing 45-degree miter cuts. Test-fit before nailing, as actual wall corners are rarely a perfect 90 degrees. A digital angle finder takes the guesswork out of this step entirely.
Uneven floors are one of the most common installation headaches. When a gap appears between the bottom of the baseboard and the floor, resist the urge to force the board down. Instead, use shoe moulding or quarter round along the base to bridge the gap naturally. For larger irregularities, scribing the bottom edge of the board to follow the floor contour is the cleaner long-term solution.
Special Scenarios
Installing baseboard on stairs requires cutting the board at the angle of the stringer, typically between 35 and 42 degrees depending on the staircase pitch. Measure the rake angle carefully and transfer it to your miter saw before cutting. The pieces should run parallel to the stringer and meet cleanly at the landing.
Around kitchen cabinets, baseboard typically stops at the cabinet face and is finished with a small return cut, a short mitered piece that tucks the end of the board back into the wall cleanly.
On concrete walls, adhesive and masonry nails replace the standard nail gun approach. Construction adhesive applied in a zigzag pattern along the back of the board, combined with a few masonry cut nails for reinforcement, produces a secure hold. Allow full cure time before applying caulk or paint, as movement during drying can break the adhesive bond before it sets.
VIII. Finishing Touches & Maintenance
Installation is only the beginning. How you fasten, finish, and maintain your baseboard determines whether it looks professionally done or just close enough.
Fastening
Glue vs. Nails Nails are the standard for most installations, offering a secure hold while still allowing removal down the road if needed. Construction adhesive adds an extra layer of bond and is particularly useful on concrete walls or anywhere stud locations are inconsistent. For light-duty applications like shoe moulding, a thin bead of adhesive alone is often sufficient. Using both together gives the most rigid, rattle-free result.
The Clean Look
Once the boards are fastened, three materials close the gap between good and great. Painter’s caulk goes along the top edge where the baseboard meets the wall, filling any uneven line left by imperfect drywall. It also runs along the floor joint when no shoe moulding is present. Wood filler handles nail holes and any small dents or chips in the board face. Once sanded smooth, both surfaces take paint without any visible evidence of the fix underneath. End caps, small mitered return pieces, tuck exposed board ends cleanly back into the wall rather than leaving a raw cross-section visible.
Painting and Staining
Painting before installation speeds up the process but requires touch-up work afterward along seams and nail holes. Painting after gives a more seamless finish but demands careful masking of the floor. With carpet, slide a flexible paint shield between the baseboard and the carpet pile to keep the edge clean without tape. For stained wood, apply finish before installation whenever possible, as brushing stain into tight corners after the fact rarely produces an even result.
Repair
For minor dents, a dab of wood filler, a light sand, and a coat of paint is all it takes. Water damage is a different matter. Swollen or warped MDF should be replaced rather than repaired, as the structural integrity of the board is compromised once moisture has worked its way in. Solid wood can sometimes be dried, sanded, and refinished depending on the severity.
IX. Frequently Asked Question
Is baseboard and moulding the same thing?
Not exactly. Moulding is the broad term for any decorative or functional trim used throughout a home, covering everything from crown moulding at the ceiling to door casings and window surrounds. Baseboard is a specific type of moulding that runs along the base of interior walls. So all baseboard is moulding, but not all moulding is baseboard.
Should I install baseboards before or after carpet?
After. Carpet is installed first, tucked under where the baseboard will sit. The baseboard then goes on top, covering the raw carpet edge and the tack strip beneath it. Installing baseboard first leaves a visible gap once the carpet is laid, and makes the carpet installation significantly more difficult. If you are working with hard flooring, the sequence flips, flooring goes in after baseboard, with shoe moulding or quarter round added last to cover the expansion gap.
What is the most popular baseboard height for 2026?
The 5-1/4 inch profile has become the sweet spot for most residential projects this year. It strikes the right balance between presence and restraint, works well with the 9-foot ceilings common in newer builds, and reads as intentional without tipping into dramatic. Taller 7 to 8 inch profiles are gaining ground in high-end new construction, while the classic 3-1/2 inch remains standard in budget-conscious or builder-grade work.
How do I transition baseboards between door casing?
Baseboard runs up to the door casing and stops. The two pieces meet at a clean butted joint, with the casing taking visual priority since it sits proud of the wall surface. A small plinth block placed at the base of the casing, where the baseboard meets it, is the most refined solution. It eliminates the need for a tight mitered transition and gives the junction a deliberate, architectural finish that holds up well even when the two profiles do not perfectly align.
Latest News
- What Is S4S Wood? The Complete Guide to S4S Lumber for Beginners
- 15 Types of Wood Joints Used in Woodworking and Furniture Making
- Finger Joint Advantages and Disadvantages: What You Need to Know
- Finger Joint Laminated Board From Indonesia
- Finger Jointed Lumber vs Solid Wood: Which One Is Better?
- What is Finger Joint Board Used For?